Saturday, May 4, 2013

Sling Reporduction - Carolinas Islands - South Pacific Sling

In searching through museum photo archives available online I sometimes come across some unique slings and then try to reproduce them.


These slings are from the Carolinas Island region. The description of these slings were not very informative and only stated that the slings were made of 'vegetable' or 'palm' fiber.


I have woven this reproduction sling using Pandanus. My repoduction takes a lttle from each artifact.

EDIT: I wanted to give a better view of the construction on the pouch. there are six five-strand braids that make up the pouch.

Sunday, April 28, 2013

My Sling - A Tutorial

Growing up the only material I thought slings were made of was leather. In a pinch I would use my boot laces and cut out the tongue of my boot for a pouch but by and large, they were all leather or mostly leather.

Skipping ahead well now I know slings are made from many different kinds of material, wool, plant fiber, animal hair, leather, etc. In my search for the perfect combination or type of sling, besides the Chamorro sling my personal everyday favorite sling is a combination of leather and jute.

But it's not just the material used, it is also the way the cords are attached to the pouch to provide a clean release when any stone is thrown. Here's my everyday sling on the left. I made this sling using a 4 ounce soft elk hide for the pouch with braided jute cord tapered on the release cord, again to provide a clean release. I have found that this design is the best of both worlds using strong braided cords with a soft leather pouch that holds the ammo very well.

This is how it's done. My work and cutting pad has a one inch by one inch grid to show the size of materials and components.

Cut out your pouch. The size is part personal preference but a five inch long, two inch wide pouch, give or take is what is shown here. The overall length of pouch that you will need for this sling is eight inches. Your pouch should form narrow tabs as shown here. These tabs along with the holes punched into the pouch are how you will attach your anchor and release cords. As show, you will also need to make two small tear drop shapped pieces that will act as reinforcement where the slings cords attach.

For a five strand braid begin by cutting six strands about eight feet long. You will use three eight foot strands per side. Put three of the six strands together to form a bundle. Fold your three strand bundle in half to form six strands from where you will braid your anchor and release cords. Where the six strands are folded and form three loops in the middle of the bundle; push these looped cords through the holes made in your pouch and reinforcement tabs as shown.

Next fold the ends of your leather pouch and reinforcement tab through the cord loop and pull the strands tight. Now you have six strands securely attached to each side your pouch. From here it's just a simple matter of braiding and blending your cords to form your relase and anchor cords.
Here is the finished sling made with three ounce buckskin and jute fiber. The release cord begins with a five strand braid, tapering slowly then finishing off with a thin four strand round braid. The anchor loop has a soft leather padding added for comfort. The way the cords are attached hold the stone in the pouch and keeps the cords separated at their anchor point to the sling's pouch. So far I've never had any tangles of cords or hang up with the release no matter what style I am using to throw or what kind of ammo being thrown. Tomorrow may show me something different but for today, this is the best design I've used. The only addition besides the padded finger loop has been the over-braid reinforcement of the release cord where it attaches to the pouch. I have found that this is an area that shows some minor wear on my current sling, probably because of the day I spent at the railroad tracks throwing sharp angular stones.

Monday, April 22, 2013

Chicken Kelaguen Refresher


Chicken Keleguen is easy to make.

Roasted chicken, chopped. Chopped onion, grated coconut, roasted peppers, lemon and salt.

Mix all ingredients, except for the coconut, save that for last. Squeeze in the lemon a little at a time while mixing and tasting. Dish should be tangy without being sour. Add a little salt to taste then add in the coconut. For more information please see my previous post with the detailed recipe.

Monday, April 15, 2013

Recipe - Chicken Estufau

Chicken Estufau is one of several favorite Chamorro foods of mine. This dish is simple, easy to make and doesn't take a lot of time or ingredients.

YOU WILL NEED:
  • Chicken - Any amount will do. I prefer drumsticks and thighs. If you have whole chicken, cut it into medium-sized pieces.
  • Onion - About half an onion
  • Soy Sauce - About 1/2 to 3/4 cup
  • White Vinegar - About 1/2 to 3/4 cup
  • Black Pepper
  • Sugar - 1 Table Spoon
  • Olive Oil (Cooking Oil)
  • Garlic - Fresh or Powdered
  • Bay Leaf - By adding bay leaf you turn your dish into Chicken Adobo. I like my dish with or without bay leaf.
HOW:
First chop your onion, set aside a few table spoons aside and place the remainder into a bowl. Next drop in your garlic and black pepper. Each of these should be according to your own taste. I don't think I've ever put too much of either.
  
 
Using a potato masher or your hand if you prefer, crush up and mix the onion, garlic and black pepper mix in the bowl. Next pour in about a half cup or more of vinegar. Next, pour in about an equal amount of soy sauce. You must stir, taste and adjust as necessary. Your marinade will need to be both tangy and salty.

Next, place your chicken pieces into your marinade and let set while you move onto the next step. Take your tablespoon of sugar and place it into an ungreased/oiled pan on medium heat and melt the sugar. If you prefer, you can place the sugar into the dish later but I prefer melted and carmalized surgar. Pour in a small amount of oil, chopped onions and garlic and saute until the onions are tender. If you're using a bay leaf, drop it in with your chopped onions.

Now that your oil is seasoned with the onions, garlic and sugar, take your chicken pieces out of the marinade and drop them into the seasoned oil. Put the marinade to the side.
 
Stir and stir your chicken pieces. You're essentially frying the chicken at this point. Keep frying the chicken until cooked.
 
The liquid in your pan should not be allowed to evaporate all the way out. You want to keep a little liquid in the pan as you fry your chicken.

Once the juice from the chicken runs clear letting you know that the chicken is cooked thoroughly, drop in the remainder of your marinade, bring the liquid up to a boil, cover the pot then take the heat down just enough to allow the pot to simmer.

Allow the pot to simmer for about 15 minutes then taste. Adjust the flavor as necessary. If you need more moisture you can add chicken broth or a little water.

When your dish is thoroughly cooked serve it with rice, pouring the broth over the rice. Add a glass of your favorite wine and if you have it, a little pickled mango. Gof Mange! 


Monday, April 1, 2013

Fishing - Chamorro Fish Hook ( Haguet )

The ancient people of the Marianas used a number of methods for taking fish and were skilled at fishing in both shallow and deep water. Fish could be caught in the shallows as found in Apra Harbor using weirs (Gigao), channels that would guide fish into fish traps or channel the fish into areas where they could be gathered by net, spear or by hand. Chamorros also used several types of nets as well as fish hooks, hand lines and lures.   

From artifacts found we know that fish hooks (Haguet) could come in a “J”, “L” or “V” shape and could be made from sea shell, turtle shell, and bone. Some hooks consisted of two separate parts, the shaft and the tip. I made this 1.5 inch hook from mahogany wood, deer bone and pago bark fiber.  

Tuesday, March 26, 2013

The Coconut - Cracking and Grating

Growing up in the Rocky Mountains, we really didn't know much about coconuts. Occasionally mom would bring one home from the grocery store and it always generated a certain amount of excitement in our home. It was exotic and even a little mysterious. Opening the coconut was as much fun as munching on the juicy white meat. At this time we didn't have YouTube or Google and frankly had no idea how to open a coconut.

First, Dad would bring out the electrical extension cord and the drill to make holes in the top of the coconut and pour out the water. Next it was time to open the nut. We tried using a hammer but usually picked up a saw to very laboriously cut the coconut open. I can tell you now that is not the easiest way to open a coconut.

As I mentioned before, buying coconuts can sometimes be hit or miss. In choosing a coconut, it is important to shake it and listen for liquid sloshing around inside. No liquid, no good. If there is no coconut water you'll know that the coconut is probably old and could be rancid.

You'll know if a coconut is older if the three 'eyes' of the coconut are not dark brown. The coconut water inside is not coconut milk. Getting milk from the coconut is a totally different process that I will talk about in another posting. Here we're just going to talk about grating a coconut.

Now in choosing a coconut from the grocery store, once you've looked at the eyes, shaken it to feel and hear the water inside, well from there it's somewhat open to chance. Coconuts are typically not expensive and since there's no set season in which coconuts are considered ripe or fresh, they are usually available year round.


Growing up we never used coconut in cooking nor did we make coconut milk or coconut oil, we just ate the meat. Now I use coconut for cooking and if you've read the Chicken Keleguen Recipe posting, you know that fresh grated coconut gives Keleguen that special flavor.

When buying a coconut from the grocery store you must first remove the loose fiber. This will reduce the amount of crumbs and loose fibers that fall into the bowl when you grate the coconut.


OPENING A COCONUT: Once you've cleaned the outside of the coconut, removing loose fibers, take the coconut in one hand and using a large kitchen knife, strike the coconut at the center, rotating it frequently in your hand and continuing to strike it around its middle.


Your coconut should split evenly in the middle. With practice you can split the coconut without loosing the juice from the inside. It is important to taste this juice. The coconut water should be slightly sweet and savory. The meat should be thick and white. Eat a small piece. You know it's good if it's not rancid or oily. This coconut was a miss.
 

When picking this coconut off the shelf it had plenty of liquid inside but it was so old the flesh had separated from the shell and grew mold. Good thing I had picked up more than one.
 
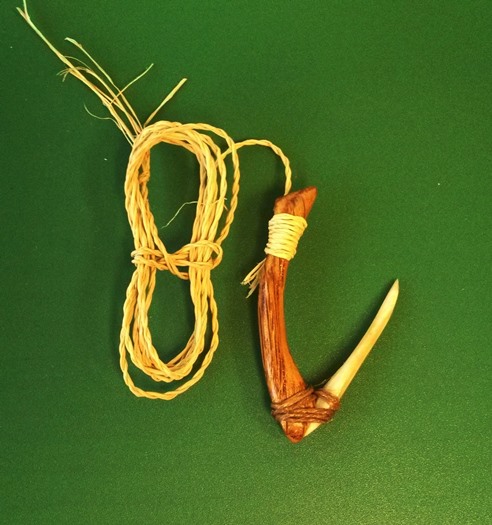
Now for grating the coconut we use a Kumyu (pronounced: come-zoo). A kumyu is simply nothing more than a serrated scraper typically mounted to a small stool.
 
I have mine mounted to a board that I sit on to hold it secure while I grate my coconut.
 
Here are three types of kumyu. I picked up the one on the left from the local Asian store but not every neighborhood has an Asian store and not all Asian stores have kumyu. The middle one is a hand made kumyu, probably from one of the pre-WWII blacksmiths on Guam and the one on the right is a modern tool.
 
So, what do you do if you don't have one of these tools. Well as you know, my being a "make do with what you have" kind of person I have a solution. Now a kumyu is a simple yet effective tool for grating coconut and can be made using simple tools and what you probably have around the house. I took an old bamboo (hardwood will work too) cooking spoon and using my pocket knife and a file, made an effective kumyu.


I trimmed the wooden spoon and as you can see, because the material was a little thick, beveled the edge. Next, using a file/rasp cut serrations long the edge of the spoon.


Finally, I mounted the wooden kumyu onto a small board, as I mentioned to sit on as a means to secure the tool I was able to make a workable kumyu in about thirty minutes.


Now, when you grate your coconut, place a large bowl underneath the kumyu to catch the grated meat and beginning along the edge of the coconut, begin scraping the inside of the coconut against the kumyu. It takes practice but it is one of the best ways to grate coconut. Work the coconut over the kumyu evenly until you've taken all the meat out careful not to scrape too deep.


Now you're grating coconut like a real Chamorro and have what you need for a variety of Chamorro dishes including coconut candy. Yum! I think I know what I can do for my next posting.
 
I took some of this coconut and added it to Chicken Keleguen but the rest will be used for coconut candy, another Chamorro delicacy. 
 

Monday, March 18, 2013

Slings From Around The World - Balearic Islands of Spain

The Balearic Slinger

The sling has played a significant role in the history of the Balearic Islands of Spain. It would be impossible to discuss the history of slinging without including the history of the Balearic Islands and it is fitting to make reference to the Balearic slingers. It is interesting to me that the very word, “Balearic”, means, literally, “Master of Throwing”. Like the Chamorro warrior, the slingers from the Balearic Islands were introduced to the world of slinging at birth. Slinging is so en grained into the Balearic culture that they still have routine competitions today.

Like the slings of the Marianas, Balearic slings were made from local materials, primarily an Agave-type of plant similar to the Yucca of the American Southwest.

This sling was made from your garden variety of sisal and is reinforced at the pouch with leather. I used buckskin for this sling but any soft and strong leather, goat for example would work fine.

Slingstones from Around The World - Part One

The most commonly thrown slingstone is, well, it's stone. Smooth round or oval stones are preferred. If you remember your Sunday School lessons, young David chose five smooth stones before he faced Goliath.

Just like with most weapons, as time went on the weapon became more sophisticated through trial and error.

The most efficient slingstones were 'biconical' or football shaped and the Chamorro people pecked and ground their slingstones from local materials, stone, hard fossilized coral, limestone and fire hardened clay. Other cultures, the Greeks and the Romans cast sling bullets from lead. Now there are volumes of information written on weapons of ancient times and I won't go into detail here except to say that besides Chamorro slingstones, sling bullets made of lead are superior to anything you might pick up off the ground and load into the pouch of your sling.

As I mentioned before, slingers form a global community and the mold I used to make these lead slingstones was given to me from my Che'lu from Transylvania. These bullets are  3 ounces each. The sling I made for these slingstones is woven from Chinese jute fiber and by comparison, is a very small and narrow sling design perfect for throwing lead.

With Chamorro slingstones I can easily reach 130 yards. It means that with my Acho'Atupat, you can throw from the end zone of a football field through the uprights on the opposite end of the field. With lead, a distance shot will be increased by another 50 yard meaning one can throw a lead sling bullet through the goal post and up into the stadium seats on the opposite end. If you've never thrown lead, it is a premium ammo worth the time and effort.

Palm Fiber Chamorro Sling

It wasn't that long ago when I thought that the only slingers in the world were me, my dad and an occasional Arab protester as seen on CNN. In the last two years I've learned that the sling has been and continues to be used all around the world.

Slinging has also put me in touch with some great people from all over the world. I recently made a trade of a few slings for raw palm fiber from which I made this Chamorro sling.

To me this palm fiber is like a cross between Pandanus and Pago fiber. It's soft long leaves lay like fresh Pandanus when you're weaving it, but it's stronger and makes a fine and very fluid thowing sling.


Thursday, March 7, 2013

Finadene Recipe

Just like any good Chamorro meal, no blog about Guam would be complete without talking about Finadene. How to describe it... Some web-based recipe sites call Finadene a 'hot sauce' while others call Finadene a condiment. The only thing I know is that I love it and wonder what did I ever do without it. Now days our meals are almost never without it.

Essentially Finadene (also fina dene) is a salty/sour and spicy all-purpose condiment and/or marinade, and while there are several different varieties Finadene is made of soy sauce, lemon juice or vinegar, chopped onions and chili.

Now like with so many culturally significant recipes, local ingredients make the dish the best, living so far away from Guam and with somewhat limited resources, one must make do with what is available.

Finadene is often eaten over rice, pork, chicken, fish, vegetables... about the only things I haven't poured it over is icecream but don't believe that I haven't considered it.

What you will need:
  • Soy Sauce, AND
  • Vinegar, OR - White vinegar or apple vinegar. Apple vinegar gives your Finadene a really great flavor. Coconut vinegar is good if you can find it and best when you're eating fish.
  • Calamansi, a locally grown citris fruit on Guam. I've never been able to find calamansi in my local grocer store but have found frozen calamansi juice in the neighborhood Asian market, OR,
  • Lemons are a good and readily available alternative (no limes), even lemon powder will do in a pinch
  • Onions - We usually use yellow or especially green onion, AND
  • Chili - Boonie Peppers (donie sali) are the best but again, fresh peppers are not readily available in the Rocky Mountains but Thai peppers are a suitable alternative and in a pinch, dried and crushed red pepper will work. One word of caution, habanero peppers, while hot give Finadene an odd taste and should be avoided.

What to do:
Like most of my recipes, measurements can be somewhat relative and I always adjust to taste. Keep in mind that with Finadene, your finished dish should not be too salty or too sour and how spicy you want it is up to your own taste.

First chop your onion. The onion should be chopped, not minced and you'll need about a third to half a cup.

Second, if you're using Thai Pepers, roast them first. I use the stove but sometimes use a small flame. Other chilis can be roasted too. Roasting the pepers gives a good flavor to the finished dish.

Crushing the peppers will yield the most flavor and heat. 
If you've never seen Boonie Peppers, they are very small and very hot. I was able to bring some back home with me from my last trip home and keep them in the freezer. For dried and crushed red pepper, you will need about a teaspoon full, more or less depending on your heat tollerance.

Third, sqeeze one or two lemons and pour into the bowl holding your chopped onions. Drop your peppers in and using a fork, squeeze the chili and onions to get the most flavor out of them.

If  you're not using calamansi or lemon, use white or apple vinegar. Start off with a third cup or so. 

Fourth, pour in the Soy Sauce. Now comes the question of how much. The best way to describe it is, pour in the soy sauce a little at a time, mixing as you pour until the mixture is the color of a good cup of coffee. Then taste. If your Finadene is too salty, pour in more lemon juice or vinegar. If your Finadene is too sour, pour in more Soy Sauce. Again, it is mixed to taste. Exact measurements of your ingredients are not important and the best way to make Finadene is to taste and adjust as necessary to your liking. It is important to keep trying until you get it right. As I have mentioned before, I am Chamorro by marriage but so far everyone who has tasted my Finadene say that it is really good.  
Now the dark Finadene is usually best served with pork, chicken, venison, elk or beef. For fish, use the same basic recipe of onions, pepper and vinegar but instead of using Soy Sauce, use regular table salt.


Sunday, March 3, 2013

Old Meets New for Today's Chamorro Warrior

Most of the slings I make are Chamorro with some other Pacific Islander slings sprinkled in. Occasionally I add embelishments or use different braiding techniques but by and large, if the pouch is not made with five strands of five cords a piece with a wrist anchor, it is something else.

Here I've created several different designs, all within the spirit of the original Chamorro sling, only adding individual style.

Keeping with this practice I've taken the original design, this one here with natural fibers in the original design, no additional weaving and made a modern version from 550 parachute cord.

Close up of the Chamorro 550 Warrior Sling.
I use a finger loop as my anchor when I sling but it seems that wrist anchors were often, if not exclusively used by Chamorro Slingers. Here is a how the wrist anchor is used. The loose end of the wrist loop comes down the center of the palm then between the fingers of the throwing hand. You can alter or change which fingers your anchor cord comes through.